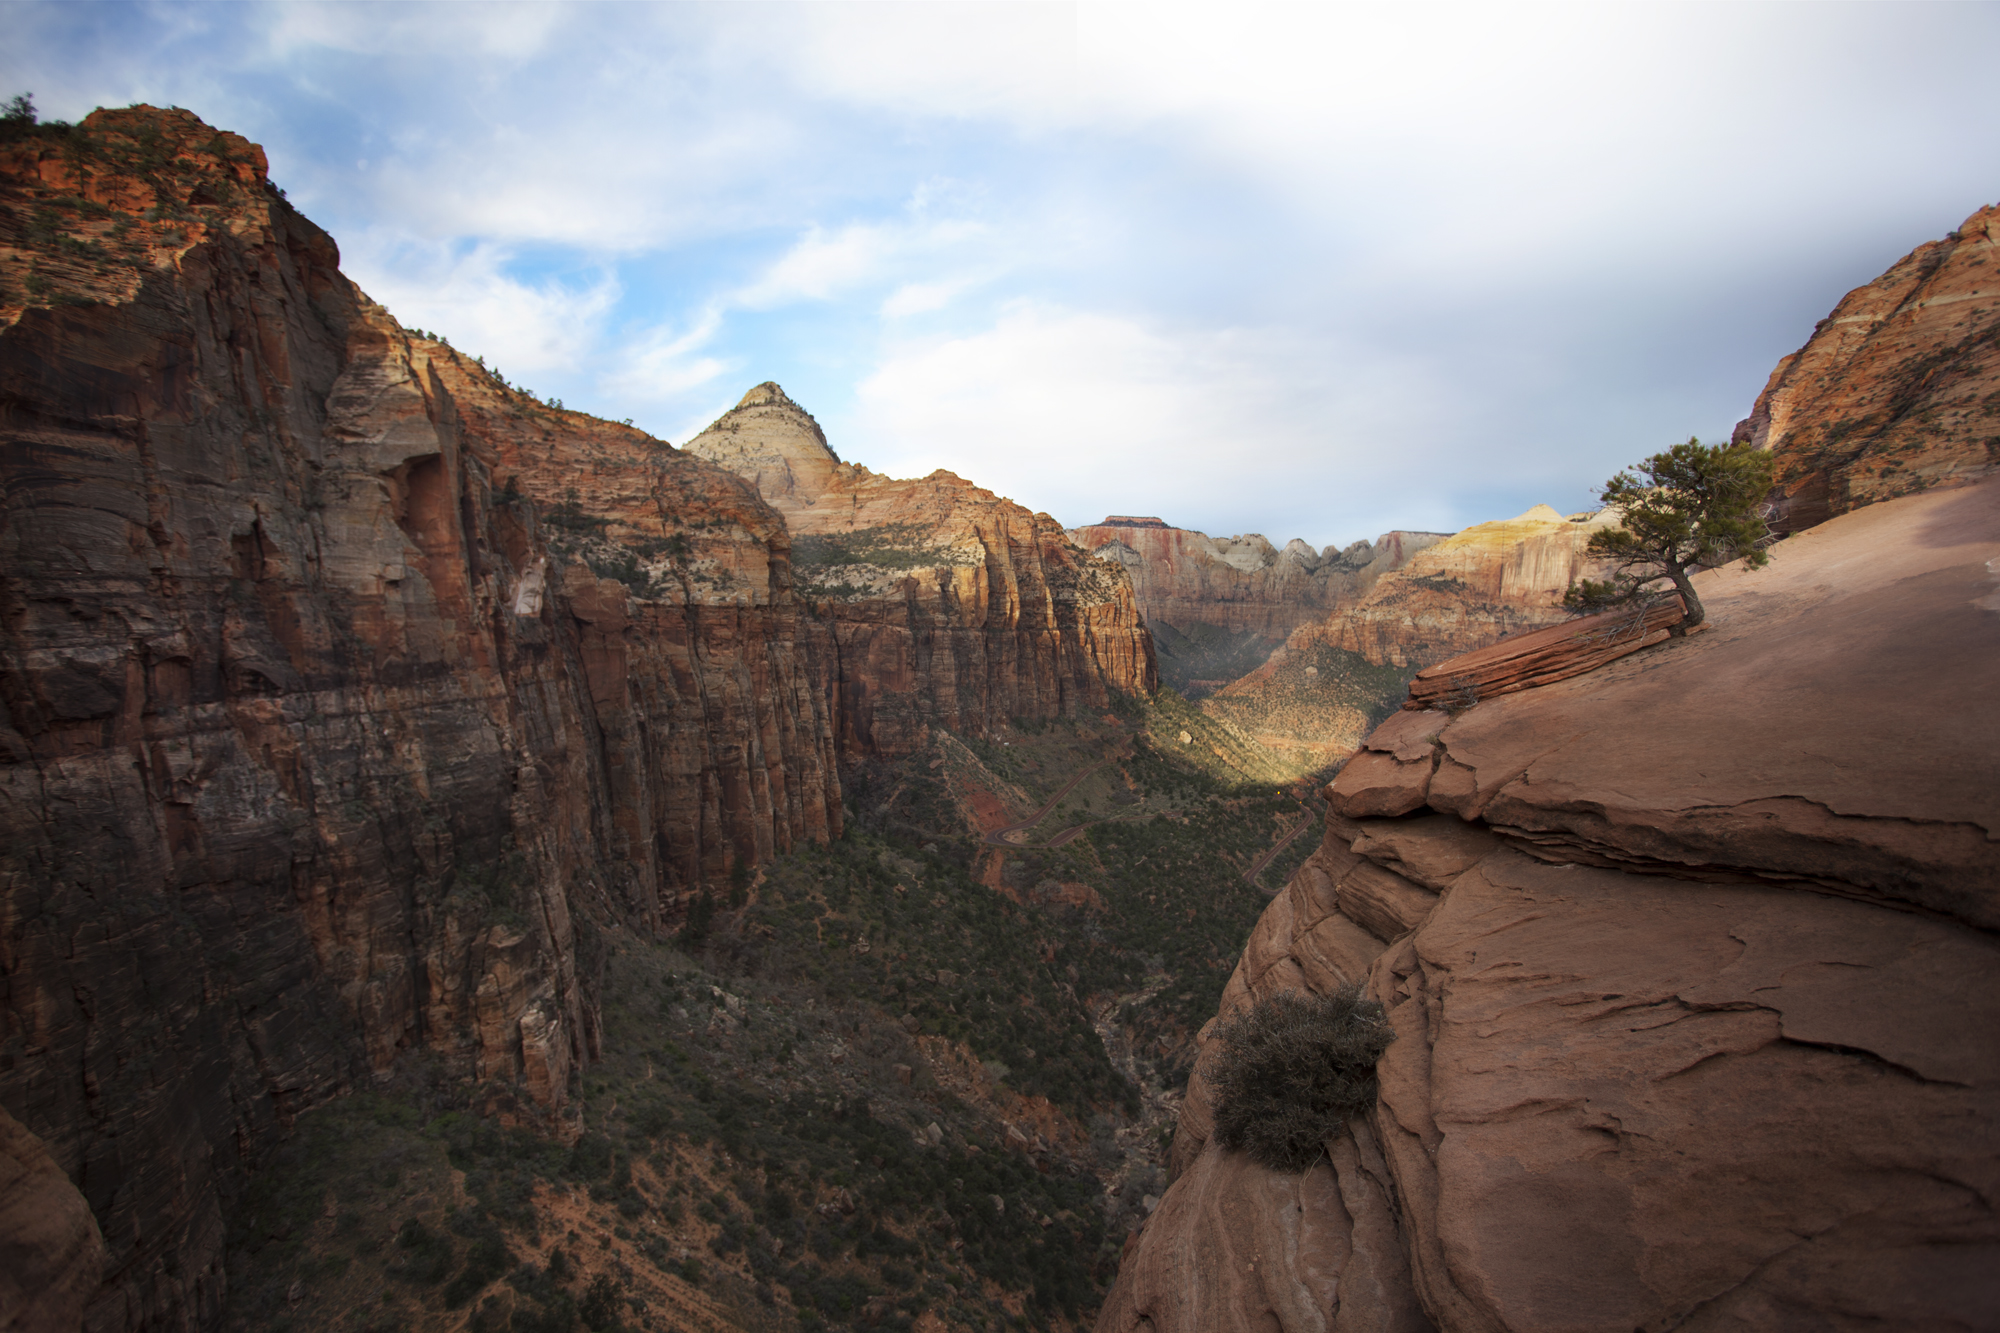
You’ve seen the photo. It’s that massive, sweeping view of the Pine Creek Canyon switchbacks snaking down toward the floor of Zion. It looks like it took a grueling, five-hour climb to reach, but honestly? It’s a mile round trip. That’s the magic—and the curse—of the Zion Canyon Overlook Trail. It is arguably the highest "reward-to-effort" ratio in any American National Park, which means it’s also a chaotic mess if you show up without a plan.
Zion is a place of extremes. You have the terrifying heights of Angels Landing and the knee-deep water of The Narrows. The Canyon Overlook sits somewhere in the middle, offering the grandeur of the high peaks without the "I might actually die" adrenaline.
But here’s the thing. Most people treat this hike like a checkbox. They park (if they’re lucky), walk the half-mile out, snap a selfie, and leave. They miss the Jurassic-era geology happening under their feet. They miss the desert bighorn sheep that literally hang out in the shadows of the alcoves.
The Parking Nightmare Nobody Warns You About
Let's get real for a second. The biggest obstacle isn't the elevation gain. It’s the parking lot.
Located just east of the Mount Carmel Tunnel, the parking area for the Zion Canyon Overlook Trail is tiny. It’s basically a joke. There are maybe nine or ten spots in the primary lot and a small overflow area further up the road. If you arrive at 10:00 AM, you’re going to be circling like a vulture or, worse, tempting a ticket by parking illegally on the soft shoulder. Don't do that. The rangers at Zion don't mess around, and the "no parking" signs are there because the road is narrow and dangerous for pedestrians.
If you can't find a spot, keep driving east. There are a few pull-outs about a quarter-mile up. It adds a bit of walking, but it beats sitting in a line of idling SUVs while your blood pressure spikes.
Why the Zion Canyon Overlook Trail is Geologically Weird
Most of Zion is viewed from the bottom up. You’re in the canyon, looking at the walls. This trail flips the script. You start high on the plateau and look down.
As you start the hike, you’ll notice the ground feels different. You’re walking on Navajo Sandstone, which is essentially a massive, frozen sand dune from the Early Jurassic. About 180 million years ago, this was the largest sand desert in Earth's history. When you look at the "cross-bedding"—those diagonal lines in the rock—you're looking at the literal direction the wind was blowing millions of years ago. It's wild.
The trail itself hugs the cliffside. In some spots, the Park Service has installed handrails, which is great because the drop-offs are sudden. You’ll pass through a shaded "alcove" or recessed cave area. This stays cool even in the heat of July. It’s damp, sometimes dripping with water from "weeping" walls, where groundwater seeps through the porous sandstone until it hits a layer of impermeable shale and squirts out the side. This micro-environment allows ferns and moss to grow in a desert. It’s a weird, lush pocket in a land of red rock and heat.
The Tunnel Factor
Directly beneath your feet as you hike is the Zion-Mount Carmel Tunnel. Finished in 1930, it was an engineering marvel. While you're looking out at the view, you might hear a faint rumble or the honk of a horn. That’s the traffic inside the mountain. There are "gallery windows" cut into the side of the tunnel to provide ventilation and light for drivers, and from certain points on the trail, you can actually spot these man-made holes in the cliff face.
It’s a strange juxtaposition. You’re standing on a prehistoric dune, looking at a 1.1-mile tunnel blasted through the rock nearly a century ago, watching 21st-century cars crawl through the valley.
Dealing with the "Scary" Parts
Is it dangerous? Not really. But if you have a crippling fear of heights, your palms will sweat.
The path is mostly boardwalks and carved stone steps. There is one specific section where the trail narrows significantly with a railing on one side and a solid rock wall on the other. It feels exposed. If it’s crowded, you’ll have to do the "awkward shuffle" to let people pass. Honestly, just be patient. The biggest danger on this trail isn't falling; it's being impatient and tripping over a sandstone ledge.
- Footwear matters. Wear shoes with grip. I see people in flip-flops all the time, and they spend the whole hike sliding around on the fine "sand" that sits on top of the rock. It’s like walking on ball bearings.
- Hydration is a lie. Okay, not a lie, but people over-prepare or under-prepare. You don't need a 3-liter Camelbak for a 20-minute walk. But you do need a bottle of water because the sun at 5,000 feet hits differently.
- The Bighorn Sheep. This is one of the best places in the park to see desert bighorn sheep. They love the rocky slopes around the East Rim. Look for movement on the ridges above the trail. They blend in perfectly with the buff-colored rock, so look for the white patches on their rumps.
The Best Time to Actually Enjoy the View
If you go at noon, the light is flat. The canyon looks washed out. It’s hot. It’s loud.
Sunrise is the gold standard for the Zion Canyon Overlook Trail. As the sun comes up over the eastern plateaus, it hits the Towers of the Virgins and the West Temple across the canyon. The red rock starts to glow like it’s being lit from inside. Plus, you’ll actually get a parking spot.
Sunset is also spectacular, but remember that the sun will drop behind the high peaks of the main canyon long before "official" sunset. This creates a massive shadow that creeps up the walls. If you’re there for photography, aim for that "golden hour" about 60 to 90 minutes before the sun actually disappears.
Winter is the Secret Season
Most people visit Zion in summer. That’s a mistake. If you can get to the Overlook trail in January after a light dusting of snow, it’s transformative. The white snow against the deep red iron-oxide of the sandstone is some of the most intense color contrast you’ll ever see. Just bring traction spikes for your boots; the shaded alcove sections of the trail turn into ice rinks that don't melt for weeks.
Practical Logistics and Finer Details
Let's talk about the Great Arch. When you reach the end of the trail, you’re actually standing on top of it. The Great Arch is a massive "blind" arch carved into the cliffside. You can’t see it from the trail because, well, you’re on it. To see the arch itself, you have to look at it from the road below as you drive up the switchbacks.
- Distance: 1.0 mile round trip.
- Elevation Gain: Around 160 feet.
- Time: 30 minutes if you’re fast, 1 hour if you actually look at things.
- Accessibility: Not wheelchair accessible. Too many stairs and uneven rock.
- Bathrooms: There are pit toilets at the parking lot. Use them. There is zero cover on the trail.
One thing people get wrong is the "trailhead" location. It’s right across the street from the parking lot, just before the tunnel entrance. There’s a small ranger booth often stationed there. If the "Lot Full" sign is out, believe it. Don't try to squeeze your rental car into a space that isn't a space.
Expert Insight: The Quiet Alternative
If the Overlook is absolutely swamped and you can't stand the crowds, drive another few miles east. The Many Pools trail or the various "social trails" in the slickrock areas offer similar geology without the handrails and the tourists. You won't get the specific view of the switchbacks, but you’ll get the silence.
Zion is becoming one of the most visited parks in the country. The Zion Canyon Overlook Trail is the perfect example of the "Instagram effect"—a place so beautiful and accessible that it risks being loved to death. Treat it with respect. Stay on the marked path. The "biological soil crust" (that black, bumpy dirt) is alive; stepping on it kills decades of bacterial growth.
Actionable Next Steps for Your Hike
To make the most of this trek without the headache, follow this specific sequence:
- Download Offline Maps: Cell service dies the second you enter the tunnel. You won't be able to GPS your way back to your hotel or look up trail maps once you're at the trailhead.
- Check the Tunnel Schedule: If you’re driving an RV or an oversized vehicle, you have to pay a fee and can only pass through the tunnel during specific hours when rangers can "close" it to one-way traffic. If you're in a standard car, you're fine 24/7.
- Pack a Polarizing Filter: If you’re a photographer, this is non-negotiable. The haze in the canyon can be intense, and a polarizer will pop the blues of the sky and the reds of the stone.
- Arrive 30 Minutes Before Sunrise: This ensures a parking spot and gives you time to hike out in the predawn light (bring a headlamp). Standing at the overlook when the first beam of light hits the Bridge Mountain across the way is a core memory.
- Check the Weather for Flash Floods: Even though this is a ridge hike, the drive to get there involves narrow canyons. If heavy rain is in the forecast, the Mount Carmel Highway can occasionally close due to rockfalls.
Once you finish the Overlook, don't just head back to Springdale. Continue driving east toward the Checkerboard Mesa. The landscape shifts dramatically into white and tan conical peaks that look like something from another planet. Most people turn around at the tunnel; going further east is where the true desert solitude begins.